Regenerative Farming
On this page
Jump to a section:
How We Grow
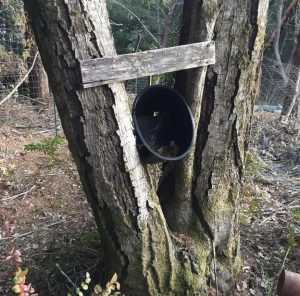
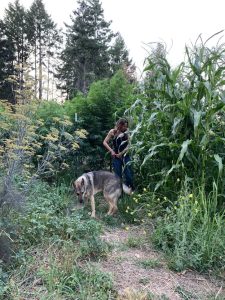
One of the most exciting things about legalization is our ability to put our roots in the ground. Literally. What does that mean exactly? Prior to legalization we were “pot growers” and that name didn’t just reflect the fact that it was pot we were growing. The name also implied the way in which we grew; the fact that it was in actual pots. During prohibition, cannabis in Humboldt was grown under the forest canopy, and in pots in trees. Growing in pots during the 215 years allowed us to grow in a way that accommodated the transient nature of the then laws; enforcement during the times of prohibition were dependent on the current politics and or the sheriff. A homestead under a 215 could have anywhere from 10 to 100 plants (25 in Mendocino County, 100 in Humboldt County). Adding or subtracting that number was the result of what new laws were being implemented and enforced and growing them in pots allowed us the flexibility to remain compliant. We could put out more plants, or take some “away,” while continuing to make a living.
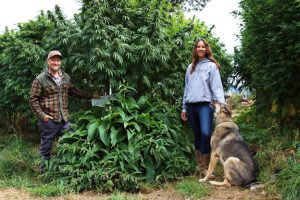
Legalization has undoubtedly come with challenges, but it has given us the opportunity to move from being “pot growers” into cannabis farmers. With this incredible opportunity we were able to transform our homestead to include regenerative farming practices throughout the entirety of our property. Instead of a few plants here and there, we were able to create a stable space for our beloved cannabis to grow and thrive under the sun and stars, with her roots in the earth and her branches and leaves free and stretching towards the sky.
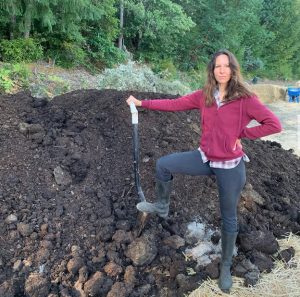
One of the first things we did to start implementing our regenerative farming practices was the building and making of soil. Our land is old logging land, with two flats that served as the log decks. Those spots on the property were devoid of nutrients; in essence it was not soil, it was hard compacted dirt. We began by adding “beds” to these spots; either by utilizing the lasagna method, building hay bale beds, and implementing huglekultur throughout. Let me explain these three in further detail.
The Lasagna Method
We’ve chosen the “no-till” method to farm our gardens, and instead we simply add nutrients directly to the earth that first create, and then sustain biology. How exactly is this done? Cardboard is placed directly on the ground (this retains moisture and promotes longevity to what’s to come), and then we add compost, repurposed soil, hay, green plant material, dried leaves, mushroom blocks, and any other debris found on the forest floor. We do one layer at a time, repeating the process again and again until we have a garden bed. In this case, a garden row. We let this garden lasagna cook for a bit and when it’s alchemized into living soils (about six months; we make it, then cover crop and plant in the spring) we plant directly into it. We also add a spectrum of beneficial plants to create biodiversity between the cannabis. These beneficial plants bring in nutrients but also create homes for the good biology and insects to keep this ecosystem balanced. You can watch this silly video from years ago that explains this garden lasagna method.
Hay Bales
Our homestead is situated in a forest, and the topography is mountainous. We utilize the slopes by creating garden beds secured and contained with hay bales. How do we do this? We begin by placing hay bales 4 to 5 feet from the slope, run rotting wood and old firewood as our base, and begin the lasagna method of gardening. With our spring and or late fall cover cropping, the soil in those hay bale gardens are as good as gold. Being a carbonous material, hay encourages worm activity; and just like how it is used to feed big livestock, it too feeds microscopic livestock. The border of hay becomes a food factory at the edge of the bed, retains soil moisture and nutrients from above, and the best part? This year’s hay bale gets flipped and put onto the soil bed and we keep stacking the systems. One of the neatest things about this way of gardening, it is actually perfect for small spaces and or rentals. Without a formal structure, you can literally take the garden with you if you move. This is because the soil is all ready to go, and the actual bed is light (no formal structure with wood, screws, nails, or metal). This also leaves a positive footprint, and one that seriously goes straight back to the earth without any work at all.
Huglekulture
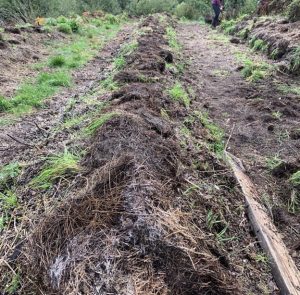
Craig and I implemented two huglekulture beds on our property; one is known as the “sauna garden” as it resides next to our beautiful Finish sauna and where I grow all my herbs and veggies that prefer more shade. The other huglekulture bed is down below the house, next to the legacy garden (the garden we’ve been growing in for over two decades). This space is on a bit of a slope that leads down to my herb and flower beds, and the four rows and “alien garden” (due to its triangle shape!) utilize this method. Some people may excavate the earth first, then add the logs and nutrients. As a “no till” farm we incorporated all the steps minus any disturbance to the soil. We used large downed tree branches, old rotting logs, green plant material, spent mushroom blocks, and more forest floor leaves and duff. You pile all the ingredients into a long pile (bigger at the bottom), and over time the wood composts and creates super healthy living soil. All that composting will continue year after year as the wood breaks down and works energetically with all the other nutrient dense decay around it. We then plant directly into this newly made soil and when we harvest the cannabis in the fall, we will leave the stalks in the earth. All plant stalks throughout our homesteads entirety are left in the ground! This is because all the root stalks have had months of communication with all the living systems underground. To uproot it would delete all the precious information exchanged between the networks below. We will cover crop in the winter and spring (as we do all the gardens) and simply plant next year’s cannabis a few inches from the old stalk.
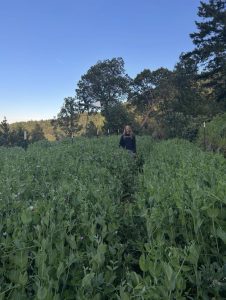
Cover Crops
Every year, usually twice a year, we cover crop all our garden spaces (except my herb gardens because they are mostly perennials. The cover crop we use is Halibaster’s and it is filled with legumes, alfalfa, clover,. Cover cropping is super important for two reasons. One, it pulls nitrogen from the atmosphere (the air we breathe is about 80% nitrogen), and stores it in the root nodules of the plants. This feeds the soil as a natural fertilizer. When the cover crop has pulled all that love from the sky, we let the chickens loose for a few days of feasting. Then we “chop and drop.” This means we push down the cover (we never disturb the roots) and then cover it with an exclusion tarp for about 7-10 days. This allows the beautiful green material to decompose and feed the soil. Having the cover crop growing during the off season keeps the soil covered; which means the plant life sequesters carbon, keeps the soil stable and moist, and holds the nutrients in place. Living plants above the ground means living systems below. We want all the soil to stay in place and when those months of rain come, we want to slow, spread, sink, and share that water with all the living beings in our little ecosystem. Check out this fun and educational video on cover crops.
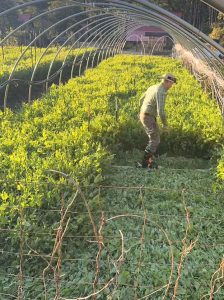
Check out this fun video of Craig stomping the cover crop:
PLAY COVER CROP STOMPING SHORT
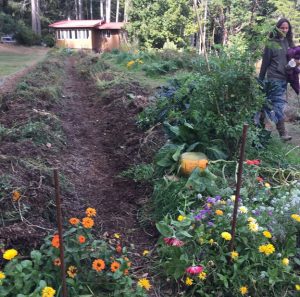
Biodiversity
Biodiversity in gardens encompasses just that; bio (life) and diversity (variety). It’s about establishing an ecosystem that supports microorganisms, plants, birds and other wildlife. You build that by creating living systems that these beautiful beings seek. We start first with creating living soils to be the foundation of our gardens. We then utilize cover crops that feed the soil by pulling nitrogen from the air that naturally fertilizes and deeply feeds and nourishes the earth. When the garden spaces are ready, we toss a wildflower mix for all the bees and butterflies and earth excavators to help break up the hard dirt; Jerusalem artichoke, potatoes, and beloved comfrey. One of the best lines said was in the movie Field of Dreams,“if you build it, they will come.” Not a truer statement in the world of regenerative farming. The Earth heals so fast when you let her and when you create a healthy ecosystem, life will show up steadfast.
Mushroom Blocks
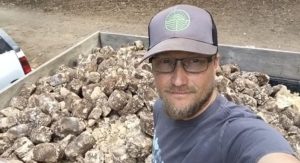
Our dear friend Mike (lovingly referred to as Mushroom Mike) is our local mushroom guy who supplies the most medicinal and nutritious fungi to our Humboldt County community; per personal sales at the various farmers markets, all the local grocery stores, and restaurants. He specializes in shiitake, lion’s mane, reishi, and oyster.We are so grateful for his commitment to the community, always wearing a wool sweater and a smile. When we started regenerative farming, we would trade fire wood for his spent mushroom blocks, which we would break up and inoculate our compost and our garden beds. Those mushroom blocks are full of carbon and mycelium, and make for very healthy soil.
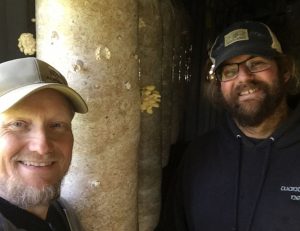
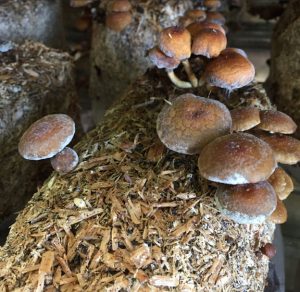
Mike gathers local tan oak sawdust from our local logging company, places it into a bag, inoculates with the seed or spores, which grows the root and mycelium (the white stuff) that binds the sawdust together. The fruit (mushroom) forms on the outside of the block, and Mike harvests the mushrooms one, two, or three times. We then take these old blocks and insert them into our hay bales, compost, and garden beds. Mycelium is the internet of the earth. It sends messages throughout the soil and forms communication networks that ignite decomposition (dead plant material and animal matter) and nutrient cycling in ecosystems. This creates a symbiotic relationship with surrounding plants (mycorrhizal relationship) to improve nutrient and water absorption. Over the years, the biology of our soil is stellar due to spent mushroom blocks. These are a must have for all soil enthusiasts.